


Jobs at AK3D (Part 1: Rapid Production)
- Andrew Katrina
- Dec 5, 2023
- 3 min read

Updated: Mar 18, 2024
People talk about rapid prototyping, but what about rapid production? 26 pieces later (505 print hours), a 3D printed production quality model was ready for the Miami International Boat Show.
The Miami Boat Show showcases a dazzling array of cutting-edge and high profile vessels every year. Enthusiasts immerse themselves in the latest maritime innovations, creating an atmosphere of excitement and exploration. For this year 2021, the showcase dates were February 11th to the 15th.
At this show, unbeknownst at the time for us, the model was being fabricated for a company that was unveiling an E-jet, first of its kind for this company as a new venture in the personal watercraft sector.

The request;
Produce a high fidelity scaled model version of a electric jet ski that measures three feet in length and is replica of a digitally generated object in 7 days.
Before I go any further, please note. At this point, equipment makes a tremendous advantage to the timeline. With the latest and greatest cutting edge additive manufacturing technology becoming available every turning week, this process could look different. The process chosen was selected to generate a solution
Step 1: File discovery
The 3D files were sent by the client as a pack and go and included their latest iteration that were converted (also known as sliced) into manufacturing 3D printing files. It is very common for files to have multiple iterations from start to finish.
During this process, there can be difficulty and pain points working with different 3D file types.
It's like opening a Microsoft PowerPoint into Word. It may open but it won't be the same layout.
Some common geometric software can be Autocad, Inventor, Solidworks, Fusion 360, and Rhino. Without a 3D file, 3D printing would not be possible.
What file type do you use to generate a 3D file?
0%.Stl
0%.Obj
0%.Svg
0%.Stp
You can vote for more than one answer.
The overall length of the CAD model in real world was 9 feet. This posed a problem due to the printers only being about to produce models just shy of 6 inches at a time.
Part 2: Prep for 3D Printing
The first strategy was to scale the model down 1/3rd size and place a grid over top using CAD (the grid mimicked the size limitations of the printer). There were mixed results. Some splits lined up near seams to allow assembly seamless. Others cut crucial sections that made assembly difficult. The final solution was a hybrid between the two outcomes trying to preserve fine features while also allowing well thought cuts.
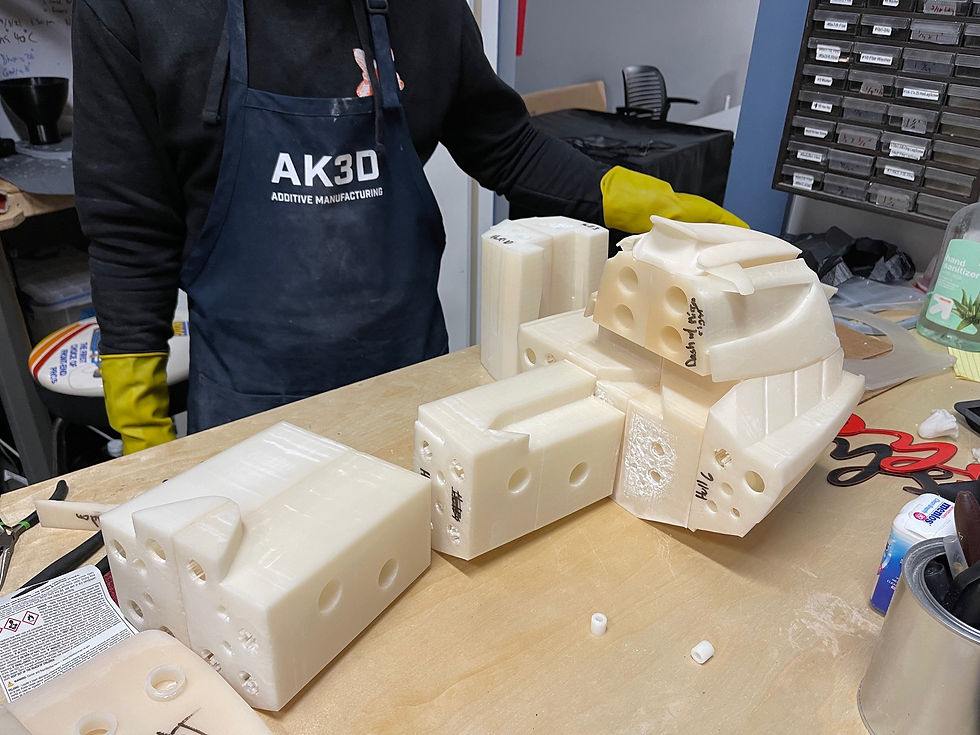
And this point, you are probably thinking the next step would be to assemble the pieces. In order for that to happen, pieces must first become available. A total of 7 printers were prepped and carried out this task. The manufacturing method selected utilized a iv-curable white plastic resin to ensure high detail and accuracy. With just one failure, a total of 36 pieces were printed out, designed with alignment pins and location indicators.
Due to the resin printing process, a wash and cure had to be done on each part. This involves bathing the part in alcohol or another chemical to help dissolve the remaining build up of uncured resin. Once removed and dried, the part undergoes uv exposure to cure the material for optimal mechanical properties.
The designing, printing, washing, and curing process was going on simultaneously at this time. Due to the number of pieces, the need to stagger tasks became apparent and this was crucial.
Projects like these allow for a sense of madness and


Comments